

According to Facebook studies, more people interact with their content than any other social network. By going on Facebook, you have the opportunity to show off your brand to up to 2 billion people all across the globe.
A Facebook business page is a publicly available account you can set up for your business, brand, or product. It has a lot in common with regular personal pages in terms of posting opportunities (photos and videos, updates, links, event announcements, etc.) but with some additional functionality.
Use our guide to create a perfectly crafted Facebook business account that will serve your business goals. The more devoted followers you get, the more opportunities for converting them into customers you will have.
What Is a Facebook Business Page?
In Facebook’s own words, a business page is like a digital storefront. It’s the account where you can manage your brand’s presence and influence the largest social network in the world. Your company’s page will look great both on PC and on mobile devices, and you can create it for free in a few minutes.
With Facebook Business, you can nurture prospects by:
- Posting content;
- Offering customer service and solving client complaints;
- Fostering collaborations;
- Connecting with followers on a personal level and a lot more.

With Onlypult, save time you spend on SMM tasks — posting to all social media, analytics, multiple links, micro landing pages, web monitoring. All in one place.
How to Create a Facebook Business Page in 9 Steps
As we’ve mentioned, creating a Facebook Business page is s straightforward process. However, you can apply some techniques discovered by industry specialists. Follow this blueprint to generate the best possible results for your Facebook marketing campaigns.
1. Set Up a Facebook Page
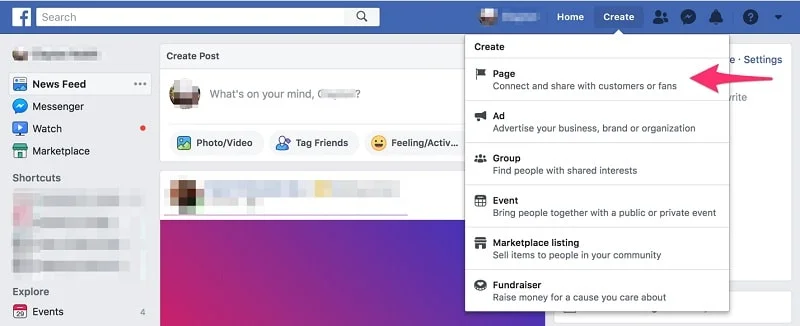
Log into your Facebook profile and go to the left-hand sidebar of your profile. Then you will need to tap on the Create tab that is sitting next to the Home page button. You will see several options, one of which will be for creating new pages.
You will be redirected to a section for specifying your name and age category. Write your company name in the first field. Bear in mind that this name should be recognizable and no different than any other social channels or your website.
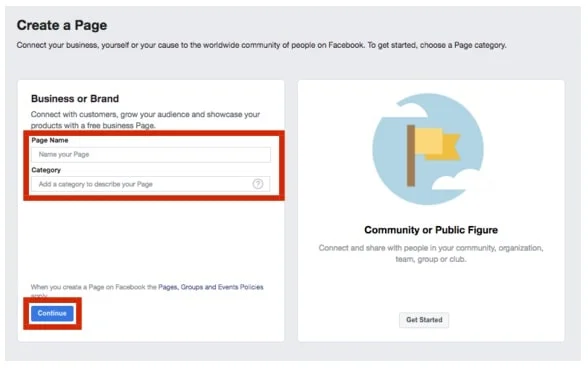
Each category option has unique features. The good thing is that you can change it at any time in case the original category is not the right fit. Currently, you can choose between six categories:
- Local Business or Place
- Company, Organization or Institution
- Brand or Product
- Artist, Band or Public Figure
- Entertainment
- Cause or Community
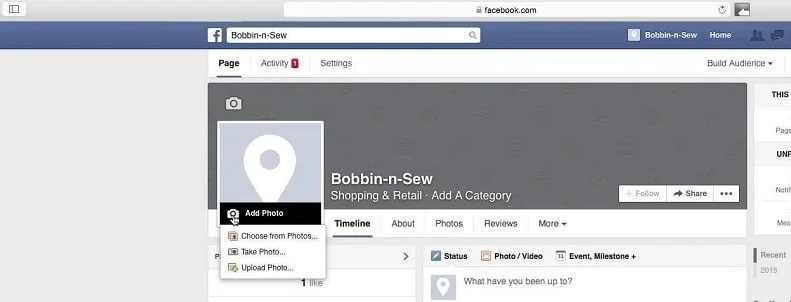
2. Design and Add a Profile Picture
Just like any visual element on your page, your profile picture should be appealing and representative of your business. It should be a simple but bright photo that visitors can’t help but look at. Preferably, it will be an image that is used across several other social profiles. This will create consistent visuals for your online presence.
The resolution should be at least 170 x 170 pixels. Even though it’s displayed in a very small format, users will notice if it’s of poor quality.
If you choose a generic photo, it’s unlikely that the user will remember it. Since one of the main reasons to create a Facebook business page is boosting awareness, you want to take the opposite approach. Instead, add your logo just like you would do with a regular store. You can take a seasonal spin on it like adding fairy lights for Christmas or adding a rainbow for pride. But the general idea is that it should change drastically.
If you have a specific company color, let your profile photo reflect it. In the example below, you can see how McDonald’s approaches it. Their profile photo has everything you need: the name of the company, bright colors that are consistent with other online platforms and offline restaurants, and perfect placement.

3. Create and Add a Cover Photo
Your Facebook cover photo is a large splash image that fills up a quarter of the screen. As you can guess, you should also take it seriously. Even if users don’t instantly notice your profile photo, they won’t be able to miss the cover. Here are a few suggestions of what it can contain:
- Your newest product
- An Interesting graphic of your regular product
- Current offers
- A photo of your team or physical store/office/restaurant
The dimensions for the Facebook banner are 851 x 315 pixels. Keep in mind that the desktop and mobile versions display it differently – on mobile, the sides of the cover photo are cut off. Even though the majority of users will browse your page on mobile devices, it’s not an excuse to dismiss other audiences.

Other than technical specifications, your banner must meet Facebook page guidelines. Similar to other photos you post on your pages, the cover should follow the following rules:
- It should not have copyrighted content.
- It should fall under the categories of “family-friendly” and “safe-for-work”
- It doesn’t break any advertising rules of the platform.
4. Add a Call-to-Action Button
Some time ago, Facebook introduced personalized CTA buttons, and you can change where you want the users to be directed after clicking it. It can be your home page, a landing page, a contact form, or anything else. Take some inspiration from these commonly used CTA buttons on Facebook:
- Sign Up
- Shop Now
- Contact Us
- Book Now
- Use App
- Watch Video
- Play Game
The choice between different CTAs is your decision. Align it with your most important business goal at the time and change it up whenever needed. For example, if you’re focusing on growing your blog or newsletter subscribers, you can add “Sign Up”. If you have a promotional video you would like to draw more attention to, add “Watch Video”.

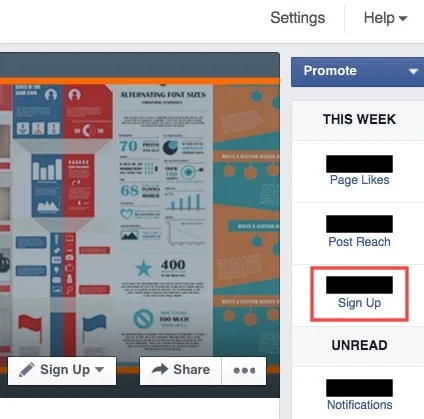
A little-known fact is that Facebook shows you how many people clicked on the button for a certain period of time. The number of clicks is displayed in the CTA button’s copy. You will also see small graphs showing you the dynamics of CTA clicks. It’s especially useful if you recently changed the button and want to see how effective it is.
5. Write and Add a Description
Now is the part to convey your company message through words. It bears no less significance than your visuals since it involves the information that people will see in search results. You don’t have a lot of characters to work with, but it’s for the better – shorter texts do extremely well on the Internet these days.
We’ll give you some ideas of what you can include in your description. You don’t have to choose one particular category – try mixing a couple of them and come up with a unique description. You can share:
- Your company story – Describe the company’s trajectory, successes, and failures. Compelling, emotional stories make the biggest impact and appeal to the audience’s feelings.
- Type of service or product you offer – Be specific about what people can buy. Assume that people don’t know anything about your brand, and this is their first encounter with it.
- Contact information – Choose whatever channels you frequently use: phone, email, Facebook Messenger, and so on. Make it clear where people can head with their inquiries.
- Other social media accounts – Chances are, Facebook is not the only online platform you use. Cross-promotion across several media accounts can be a good way to show your brand from different angles.
- Policies on your account – If you have community guidelines for posting, commenting, or other interactions, let users know.
6. Create a Custom Username
When you first create a Facebook account, you are given a unique URL identifier, which is something like facebook.com/YourCompany-987654321. While there is no harm in leaving it as-is for some time, a better move would be a customized URL.
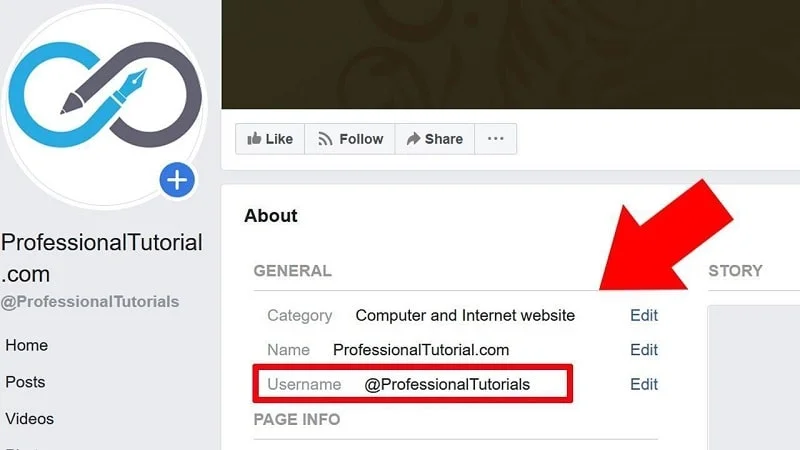
It can be the same as your page name or something very similar to it. Once again, you want to create consistency whenever possible. If the username is taken, you can either contact this account or turn to creativity. It’s important to mention that using abbreviations or acronyms that aren’t directly in your company name is not a good idea.
7. Customize Your Page
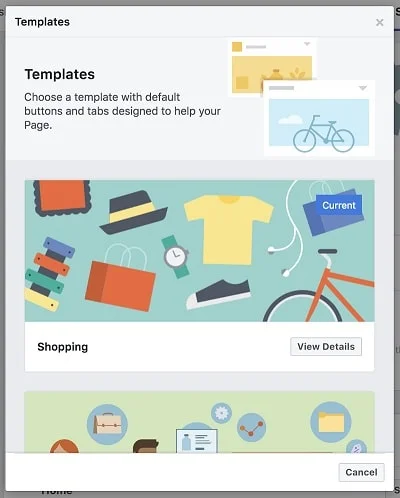
The topic of customization doesn’t stop at your username. You can make further changes to how your profile looks and make it stand out from other similar accounts. Look for the “Templates and Tabs” section in your settings and play around with different features. For example, you can arrange tabs in whatever order makes sense.
Facebook has been very accommodating with this feature and offers many ready-to-use templates. They cover the following categories:
- Shopping
- Business
- Venues
- Movies
- Nonprofit
- Politicians
- Services
- Restaurants & Cafes
- Video Page
In terms of what tabs you can add and arrange, there is a lot to choose from as well. You can set up tabs for current offers, service and product descriptions, photos, videos, live videos, posts, reviews, events, groups, and many more.
8. Adjust Important Privacy and Security Settings
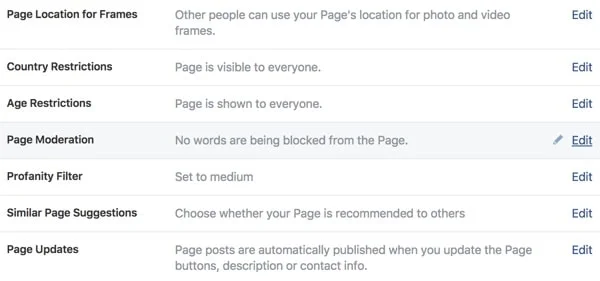
There is a lot of flexibility in the options within Facebook settings. For example, you can set who is allowed to tag your page and share it with others. Our recommendation is to give permission to everyone. If another account posts about you on their timeline and tags you, it’s essentially a free promo for you.
You get to decide whether you want your page shown as a suggestion when people look for certain topics. You can set profanity filters in the page moderation section. If you want users to see when you’ve changed page information or photo, you can also make these tweaks in the settings.
There are many other aspects that you can adjust: messaging, editing, notifications, messenger, page roles, preferred page audience, and other page settings.
In case your company is in the alcohol and tobacco industries or offers some kind of age-sensitive products, it makes sense to restrict certain ages from seeing your page. This will appeal to advertisers who don’t want to be associated with promoting offensive products to children.
9. Finalize Page Details
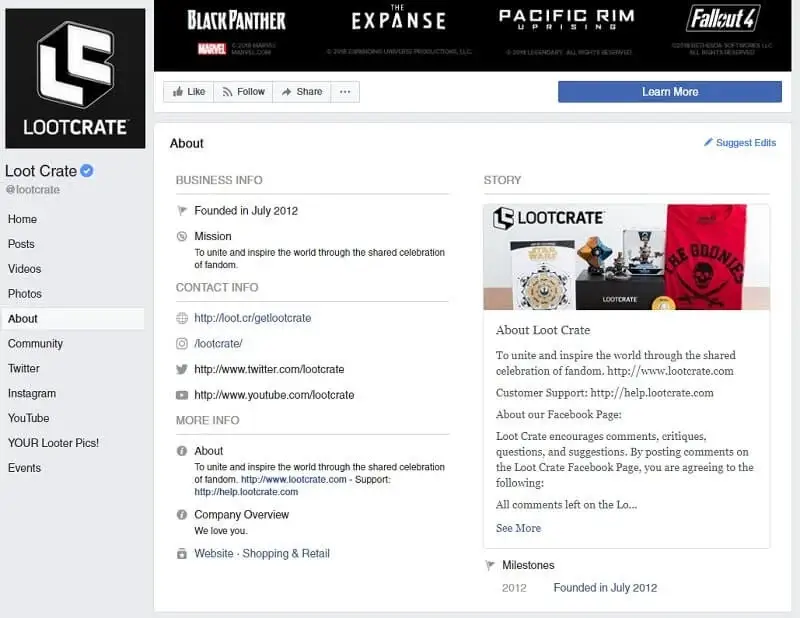
Lastly, you need to revise your page to make sure it contains everything you need. Take a look at your About section and complete all the details that you forgot to include. Facebook algorithms favor pages that give as much information as possible.
Plus, there are many direct perks of having all page details completed. For example, you can answer a specific inquiry that a potential customer can’t find anywhere else – from additional links to industry awards. You can also benefit from featuring team members and their profiles.

When you’re happy with the information you provided, it’s time to go live and start posting. Go to page visibility and click Page Published.
After making your account publicly available, you can still make changes at any time. Remember to update your Facebook profile every time your company goes through changes. Whether it’s another physical address or phone number, a new line of products, or even a new company name, go to your Facebook page and add relevant information.
Next Steps
Creating a page itself is certainly an important step, but only the beginning of a long process. Now you need to generate, post, and promote your content. We can pinpoint several activities that you should focus on next.
Add Collaborators
Whether you are a small start-up with two marketers or a larger company with an entire marketing team, you want every member to have access to your Facebook page. You can assign different roles and access levels:
- Admin – The one that manages page roles and has access to all settings. If you have created the page, you’re deemed an admin by default.
- Editor – They’re not allowed to assign roles but, other than that, they can accomplish a variety of tasks. This position is most suited for the person responsible for day-to-day activities.
- Moderator – An employee who handles customer service for the business. While they can’t post content, they can respond to comments, remove them, and ban users.
- Advertiser – This position is reserved for a member that creates ads for the page. As you can guess, they can see, set up, and edit ads.
- Analyst – They can view insights and see who published as the Page, but they can’t edit the page, interact with comments, send messages, or anything like that.
To manage collaborations, go to Page Roles in the settings and type in the email address associated with a Facebook account or username of the person who’s liked your page.
Publish Your First Post
What’s the point of having a Facebook business page if there is no publication on it? It might be intimidating to create your first post. However, you shouldn’t overthink it – creating content for social media isn’t a one-time occasion but a long-term journey. For the introductory publication, consider the following points:
- Greeting your viewers. Include a personal touch in your first interaction with existing and potential customers. It shouldn’t be something out of the ordinary – just a simple greeting that you might have already used on your website.
- Introducing your team. Who are the people behind your company? You can address them by names, share their positions, and talk about what impact they had on your business.
- Sharing interesting facts about your company. Chances are you have some stories to tell. If you’re a rising brand, share how and why you started it. If you’ve been around for a while, talk about your journey and what you’ve accomplished so far.
- Going straight to product promotion. You might as well go straight to business. One of the reasons to create a Facebook page is to promote your offerings so you can start with this information.

Onlypult posts to all social media platforms, provides analytics data, builds teamwork and saves you time.
Promote Your Page
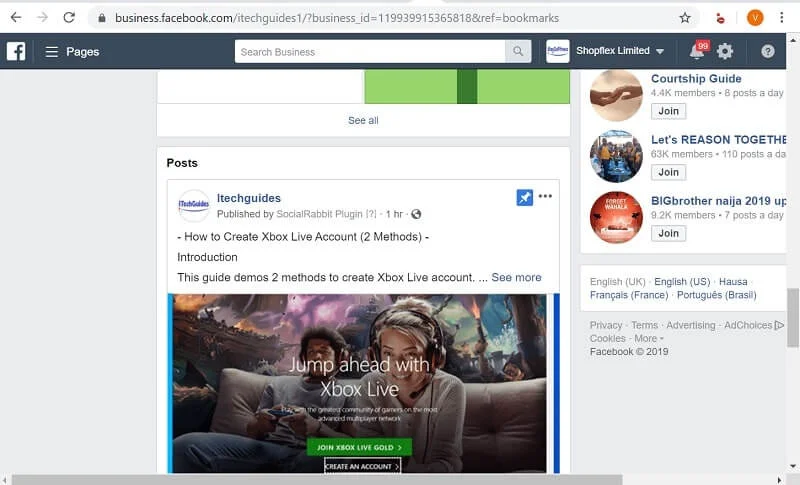
There are tons of options to promote your page and posts. For example, Facebook features a full array of widgets and buttons for adding your page to the company website. This way, your website visitors won’t have to specifically search for your account on Facebook. They can simply click on a plugin, and it will redirect them where you need them to go.
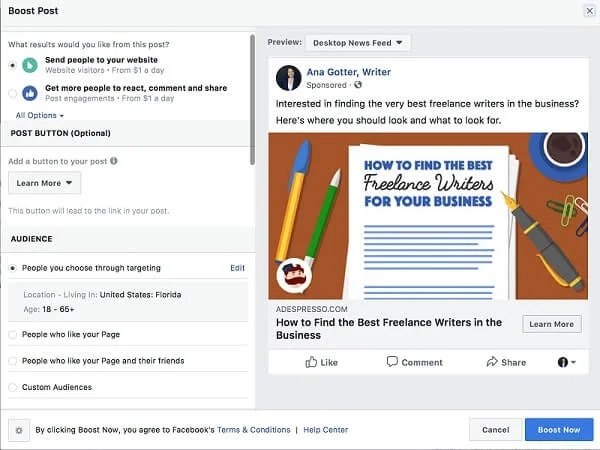
You can also promote your first post on other people’s timelines. Even if they’ve never come across your account, they will see the post marked with the Sponsored tag. Not only will you introduce yourself, but you will also educate, entertain, or inform them depending on the post you’d crafted.
Add your Facebook page to your email signature. This feature is also a useful way to bring more visitors to your Facebook account without making them go on the website itself. Whether it is a newsletter or communication with business partners, it makes sense to steer their attention to your social media.
Analyze to Understand What Has Worked and What Hasn’t
An important part of social media management is evaluating the results. Based on past performance, you can make your future activities even more effective.
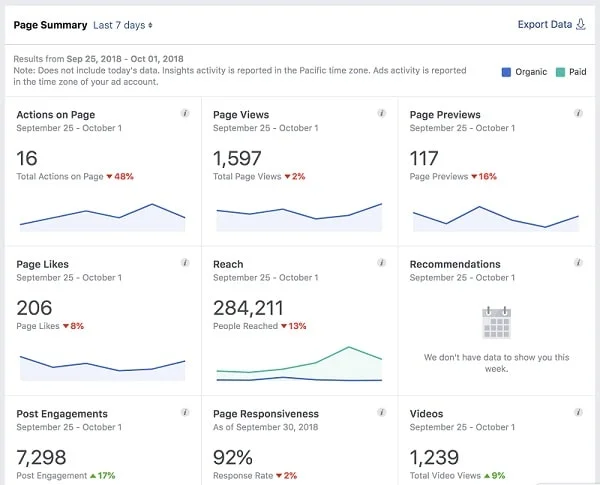
The first thing you want to start with is the built-in analytics inside the platform called Facebook Insights. It generates detailed reports based on a huge number of stats and numbers about your account. While it’s not as comprehensive as some of the social media management tools, it’s a great starting point.
After you publish several posts and engage in a promotional campaign, you should have enough data to work with. For example, you can view page likes, reach, and engagement. You can compare the results for the week with the previous one. If you see positive improvement, identify the reasons, and use these techniques more. If it’s the opposite, you should also pinpoint why that happened and eliminate this part of the strategy in the future.
Then, you can go into more detail by using a specialized service. On top of having the basic statistics about your account, you can spend more time analyzing exhaustive reports that Facebook Insights don’t provide. The bottom line is that the more data you can gain, the better. But then, you should convert them into actionable insights.

Onlypult helps collect and track mentions of you and your competitors to let you be one step ahead of them. A free plan is available.


